> ## Documentation Index
> Fetch the complete documentation index at: https://docs.contactship.ai/llms.txt
> Use this file to discover all available pages before exploring further.
# N8N
> Guide to integrating ContactShip with N8N to automate AI phone calls
## What can you achieve with ContactShip + N8N?
[N8N](https://n8n.io) is an open-source, no-code automation tool that, when integrated with ContactShip, lets you do things like:
Trigger an AI agent call automatically when someone fills out a form.
Qualify leads in real time without anyone having to call them manually.
Handle phone calls and automatically create support tickets for customer service.
Send call reports directly to your CRM or via email — all without writing a single line of code.
## What you need to get started
Before you begin, make sure you have:
1. **An N8N account** — either [self-hosted](https://docs.n8n.io/hosting/) (open source) or the [Cloud version](https://n8n.io).
2. **A ContactShip account** — you can [sign up for free](https://app.contactship.ai) and try the platform.
***
## Step 1: Install the ContactShip node in N8N
ContactShip has a community node in N8N that you need to install in your account.
In your N8N account, go to **Settings** from the side menu.
Inside settings, scroll down to the **Community Nodes** section.
Click **Install** and type:
```
n8n-nodes-contactship
```
Accept and install. That's it — the ContactShip node will now appear in your account.
Once installed, when you create a new workflow and search for "ContactShip", you'll see the community node with **Triggers** (execute when something happens) and **Actions** (perform an action, like making a call).
***
## Step 2: Set up your credentials (API Key)
For N8N to connect with your ContactShip account, you need to create a credential with your API Key.
When you add a ContactShip node for the first time, it will ask you to set up a credential. Click **Create New Credential** and give it a name you can easily identify (for example, your account name).
Log in to [ContactShip](https://app.contactship.ai), go to the side menu, and enter **Organizations**. Scroll down to **API Keys** and click **Generate Key**.
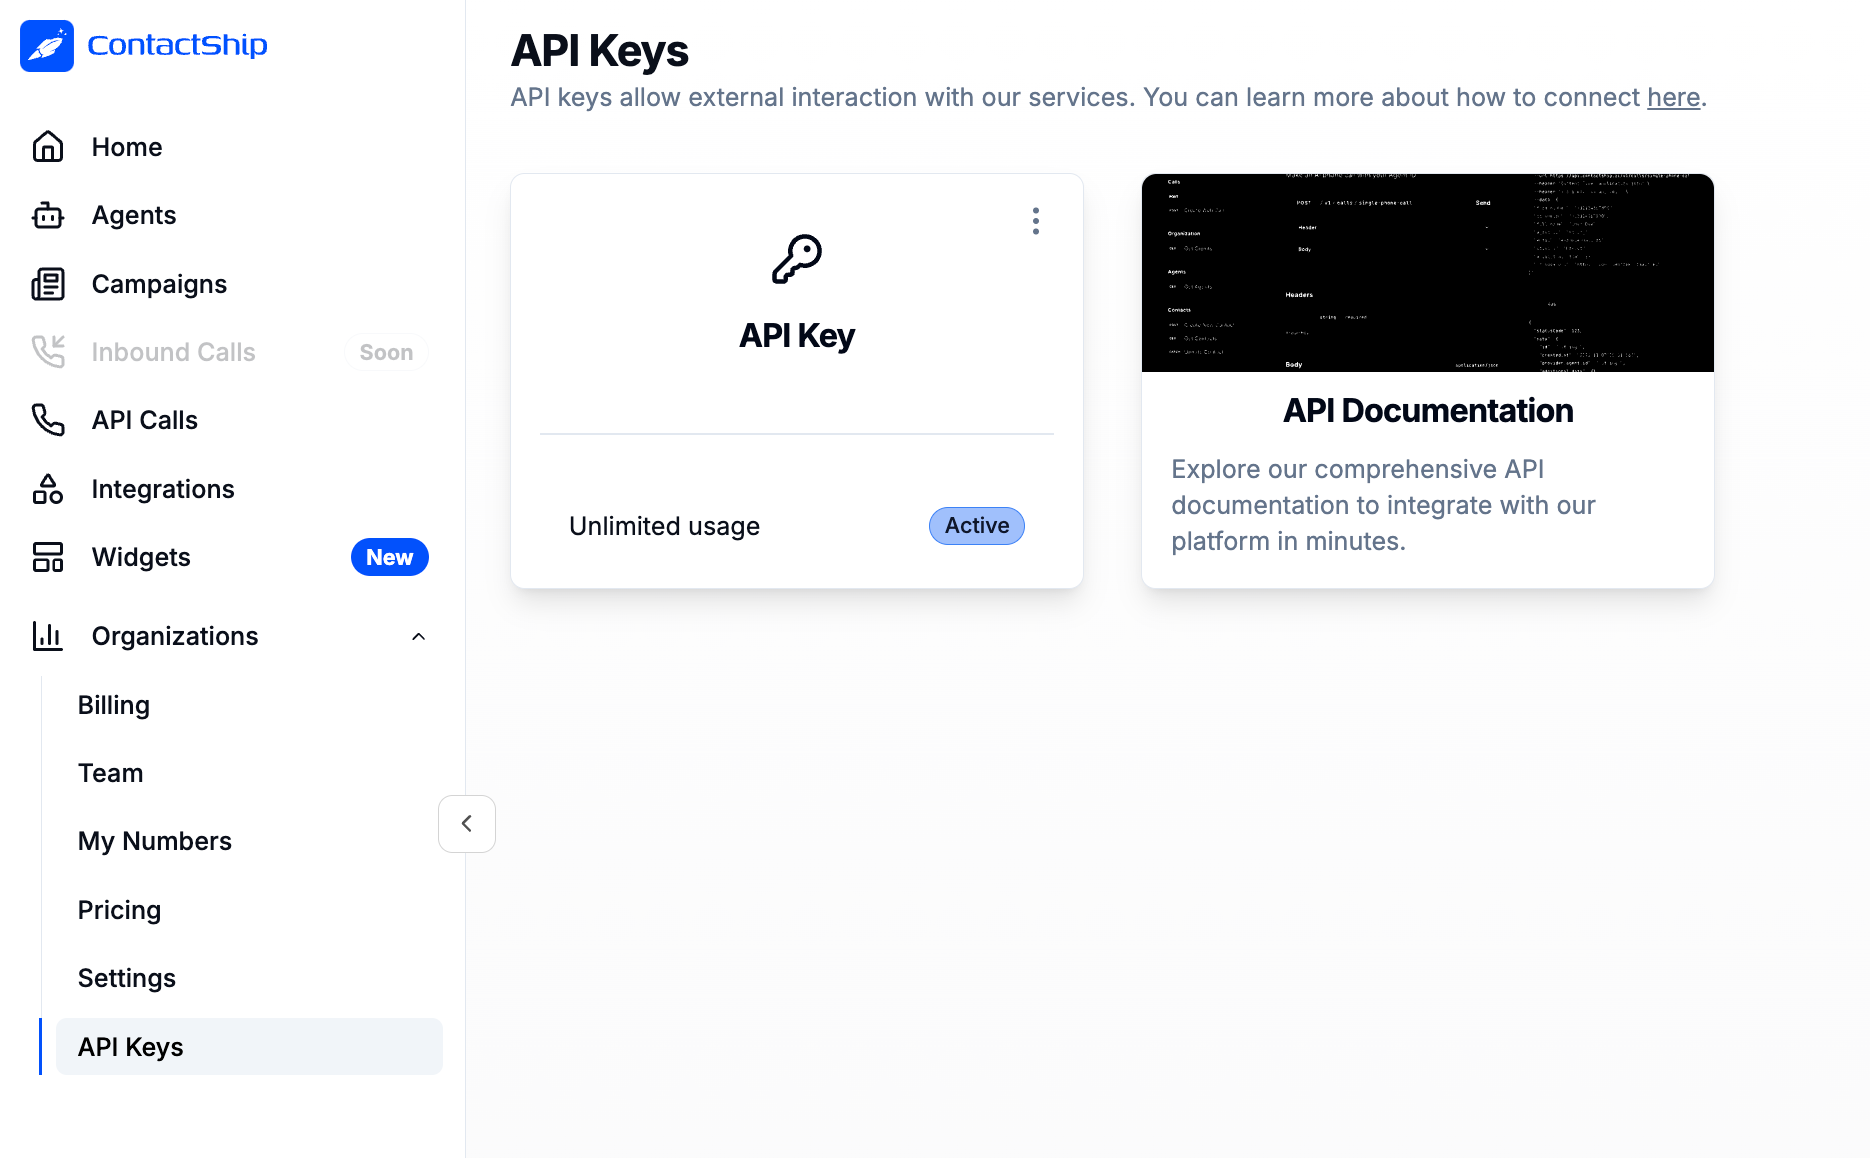 The API key is only shown once. Copy it and store it securely. Anyone with access to this key can execute actions on your account.
Go back to N8N, paste the key in the **API Key** field, and click **Save**. The connection is ready.
***
## Step 3: Configure your first call node
Now that the connection is ready, you can set up your first node to make a call with an AI agent.
In your workflow, add a ContactShip node and select the **Make an AI Phone Call** action.
Choose which agent you want to make the call. If you don't have an agent yet, you can create one from the [Agents section](https://app.contactship.ai) on the platform.
Select which phone number you want to call from. You'll see the numbers already registered in your account.
If you don't see your number, you can add it from **My Numbers** on the platform, or type it directly using **Expression** mode with the area code included.
Complete the required fields:
* **To Number**: The number you want to call.
* **Full Name**: The person's name.
* **Country**: The contact's country (important for timezone control in campaigns).
And optionally:
* **Email**: The contact's email address.
***
## Step 4: Enrich the call with additional data
This is one of the most powerful parts of the integration. You can pass additional information to the AI so it **personalizes the call**.
Inside the node, click **Add Fields** and select **Additional Data**. Here you can add key-value pairs with any relevant information:
| Key | Value | What it's for |
| --------------------- | ------------------- | ------------------------------------- |
| `Product of interest` | `Inbound AI Agents` | The AI knows which product to discuss |
| `Source` | `TikTok form` | The AI knows where the lead came from |
| `Budget` | `$1000 USD` | The AI knows the budget range |
It's important that the **key is descriptive**. If you just put "x", the AI won't understand what it means. Use clear names like "Product of interest" or "Required service".
### Delay (optional)
You can also add a **Delay** from **Add Fields**. This field accepts a number in **minutes** indicating how long to wait before launching the call.
For example, a delay of `5` means the call launches 5 minutes later, which can feel more natural than calling instantly.
***
## Real example: Form → Automatic call in 30 seconds
Let's walk through a practical example: when someone fills out a form, they automatically get called by an AI agent.
### Create your form
You can use any form provider: [Tally](https://tally.so), Google Forms, Typeform, or even a custom form. In this example we use Tally with fields like:
* First and last name
* Email address
* Phone number
* Company name
* Number of employees
* Required service
### Build the flow in N8N
In your workflow, add a **Webhook** (Trigger) node. Configure it with:
* **Method**: POST
* **Path**: A descriptive name like `form-submission-tally`
You'll get two URLs: a **test** URL and a **production** URL. Use the test URL while setting things up.
In Tally (or your provider), go to **Integrations → Webhooks** and paste the N8N webhook URL. Activate the connection.
Temporarily disable the ContactShip node, click **Test Workflow** in N8N, and fill out the form. You'll see the information arriving at the webhook: name, phone, email, company, etc.
Re-enable the ContactShip node and connect the form fields to the node fields:
* **To Number** ← Phone number from the form
* **Full Name** ← First Name + Last Name from the form
* **Email** ← Email from the form
* **Additional Data** ← Company, required service, etc.
You do this by dragging values from the left panel (input) to the node fields. N8N automatically creates the dynamic expressions.
Click **Test Workflow**, fill out the form, and within seconds you'll receive the AI agent call with all the lead's information.
Remember that you need credits in your ContactShip account to make calls. You can add credits from **Organizations → Plans** on the platform.
***
## Review the results in ContactShip
All calls made through N8N will appear in the **Calls** section of ContactShip, where you can:
* Listen to the **audio recording** of the call
* Read the full **transcription**
* View an AI-generated **summary**
* See the user's **sentiment** during the call
* Check the **call status** (completed, unanswered, etc.)
* Access the **contact profile** with history, tags, comments, and more
***
## Tips for a successful integration
Don't share it publicly. Anyone with access to your key can perform actions on your account.
The test URL only works while in test mode. When you activate your scenario, make sure to update the form's webhook to the production URL.
The AI receives the key names exactly as you type them. "Product of interest" is much better than "data1".
A delay of 5-15 minutes can make the call feel more natural and less immediate after filling out a form.
N8N doesn't auto-save. If the browser closes, you could lose your work. Save frequently.
The API key is only shown once. Copy it and store it securely. Anyone with access to this key can execute actions on your account.
Go back to N8N, paste the key in the **API Key** field, and click **Save**. The connection is ready.
***
## Step 3: Configure your first call node
Now that the connection is ready, you can set up your first node to make a call with an AI agent.
In your workflow, add a ContactShip node and select the **Make an AI Phone Call** action.
Choose which agent you want to make the call. If you don't have an agent yet, you can create one from the [Agents section](https://app.contactship.ai) on the platform.
Select which phone number you want to call from. You'll see the numbers already registered in your account.
If you don't see your number, you can add it from **My Numbers** on the platform, or type it directly using **Expression** mode with the area code included.
Complete the required fields:
* **To Number**: The number you want to call.
* **Full Name**: The person's name.
* **Country**: The contact's country (important for timezone control in campaigns).
And optionally:
* **Email**: The contact's email address.
***
## Step 4: Enrich the call with additional data
This is one of the most powerful parts of the integration. You can pass additional information to the AI so it **personalizes the call**.
Inside the node, click **Add Fields** and select **Additional Data**. Here you can add key-value pairs with any relevant information:
| Key | Value | What it's for |
| --------------------- | ------------------- | ------------------------------------- |
| `Product of interest` | `Inbound AI Agents` | The AI knows which product to discuss |
| `Source` | `TikTok form` | The AI knows where the lead came from |
| `Budget` | `$1000 USD` | The AI knows the budget range |
It's important that the **key is descriptive**. If you just put "x", the AI won't understand what it means. Use clear names like "Product of interest" or "Required service".
### Delay (optional)
You can also add a **Delay** from **Add Fields**. This field accepts a number in **minutes** indicating how long to wait before launching the call.
For example, a delay of `5` means the call launches 5 minutes later, which can feel more natural than calling instantly.
***
## Real example: Form → Automatic call in 30 seconds
Let's walk through a practical example: when someone fills out a form, they automatically get called by an AI agent.
### Create your form
You can use any form provider: [Tally](https://tally.so), Google Forms, Typeform, or even a custom form. In this example we use Tally with fields like:
* First and last name
* Email address
* Phone number
* Company name
* Number of employees
* Required service
### Build the flow in N8N
In your workflow, add a **Webhook** (Trigger) node. Configure it with:
* **Method**: POST
* **Path**: A descriptive name like `form-submission-tally`
You'll get two URLs: a **test** URL and a **production** URL. Use the test URL while setting things up.
In Tally (or your provider), go to **Integrations → Webhooks** and paste the N8N webhook URL. Activate the connection.
Temporarily disable the ContactShip node, click **Test Workflow** in N8N, and fill out the form. You'll see the information arriving at the webhook: name, phone, email, company, etc.
Re-enable the ContactShip node and connect the form fields to the node fields:
* **To Number** ← Phone number from the form
* **Full Name** ← First Name + Last Name from the form
* **Email** ← Email from the form
* **Additional Data** ← Company, required service, etc.
You do this by dragging values from the left panel (input) to the node fields. N8N automatically creates the dynamic expressions.
Click **Test Workflow**, fill out the form, and within seconds you'll receive the AI agent call with all the lead's information.
Remember that you need credits in your ContactShip account to make calls. You can add credits from **Organizations → Plans** on the platform.
***
## Review the results in ContactShip
All calls made through N8N will appear in the **Calls** section of ContactShip, where you can:
* Listen to the **audio recording** of the call
* Read the full **transcription**
* View an AI-generated **summary**
* See the user's **sentiment** during the call
* Check the **call status** (completed, unanswered, etc.)
* Access the **contact profile** with history, tags, comments, and more
***
## Tips for a successful integration
Don't share it publicly. Anyone with access to your key can perform actions on your account.
The test URL only works while in test mode. When you activate your scenario, make sure to update the form's webhook to the production URL.
The AI receives the key names exactly as you type them. "Product of interest" is much better than "data1".
A delay of 5-15 minutes can make the call feel more natural and less immediate after filling out a form.
N8N doesn't auto-save. If the browser closes, you could lose your work. Save frequently.